Set-Up to Develop Apps for the Harman Radio
These set-up instructions are designed to create a development environment for the Harman VP3 and VP4 radios. All of the apps created in set-up are tested using the emulator and simulator. To install and test an app on a VP3 or VP4 radio see Bench Tester.
Set-up steps:
Installing Jamaica Emulator
Download JamaicaME_Emulator.zip from Downloads.
Install the JamaicaME Emulator by unzipping the JamaicaME_Emulator.zip file to a desired location.
To configuring eclipse to use the Jamaica ME CDC Emulator as a JRE open ‘Windows>Preferences>Java>InstalledJRE’s’. Click add a new JRE. Choose Jamaica ME CDC Emulator as JRE type. Set the JRE Home Directory to the root directory of your Jamaica ME CDC Emulator installation.
This zip file contains your references to the Java and LWUIT classes you will need to compile your app.
Installing Jamaica tools in eclipse
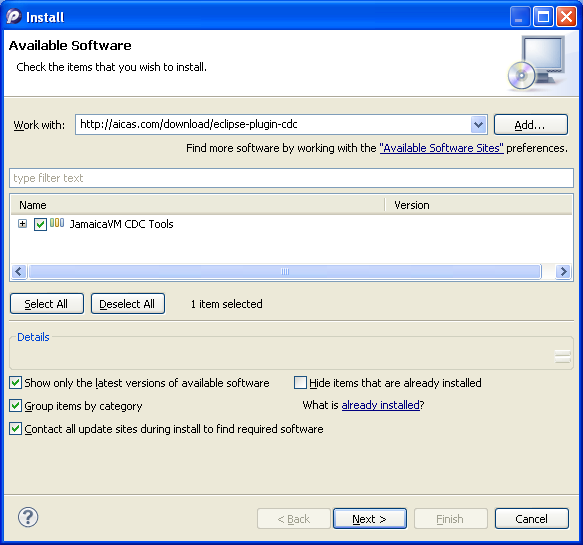
The JamaicaME CDC Eclipse Plugin and the JamaicaME CDC Emulator can be installed by downloading them from Downloads and coping them into the Eclipse plugins directory or they can be added through the Eclipse plug-in manager as shown below.
Note: The following instructions refer to Eclipse 3.6. Earlier versions of Eclipse differ slightly in the menu item labels.
Create a Hello World Xlet
Create an Xlet project from the eclipse menu by selecting “File > New > Other..” and choose “JamaicaME CDC Xlet Project”. Then press “next”.
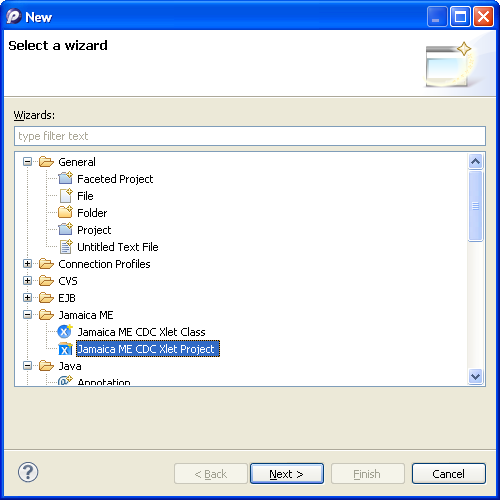
Enter the project name and press‘Finish’. The new project should now appear in the left project window.

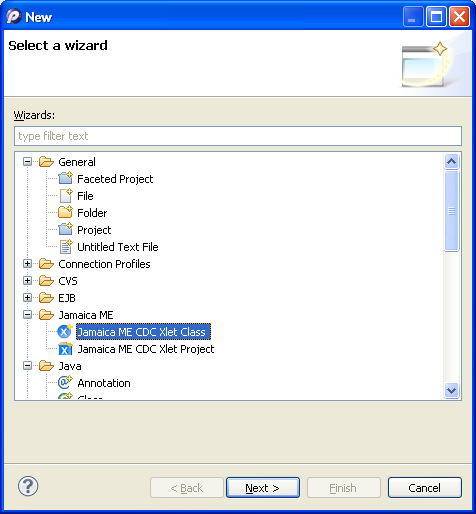
Now that you have a new Xlet project the next step is to create the Xlet class. From the menu select “File > New > Other” and choose‘Jamaica ME CDC Xlet Class’. Then press “Next”.
Enter the package name and the class name and press “Finish”. This will create a basic Xlet class.
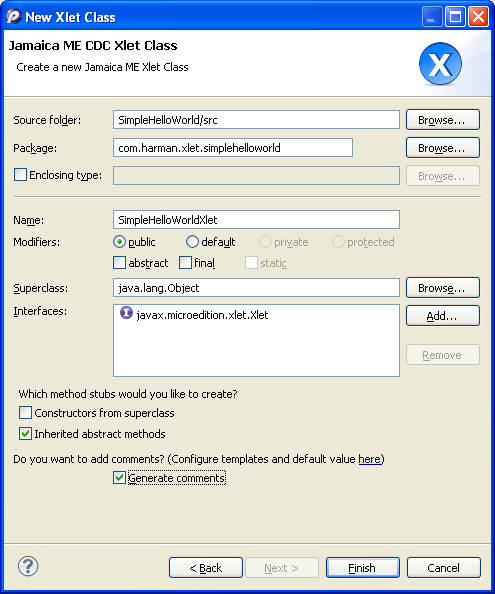
After you have created your class make sure that Eclipse has created methods for the interface, Xlet you are using.
You will also have to modify your build path to resolve the class files not found. Right click your project - select Build Path - then select Configure Build Path. Click “Add External JARs...” and add “Jamaica Emulator directory”\JamaicaME_Emulator\target\targetwindows-x86\lib\rt.jar.
Add the following imports if Eclipse did not create them to resolve the external references.
package com.harman.Xlet.simplehelloworld;

    import javax.microedition.Xlet.Xlet;
    import javax.microedition.Xlet.XletContext;
    import javax.microedition.Xlet.XletStateChangeException;
Modify the startXlet method adding a print 'helloworld’statement. Save the file, this will automatically build the program.
public void startXlet() throws XletStateChangeException
    {
        System.out.println("hello world");
    }
Debugging in the Simulator
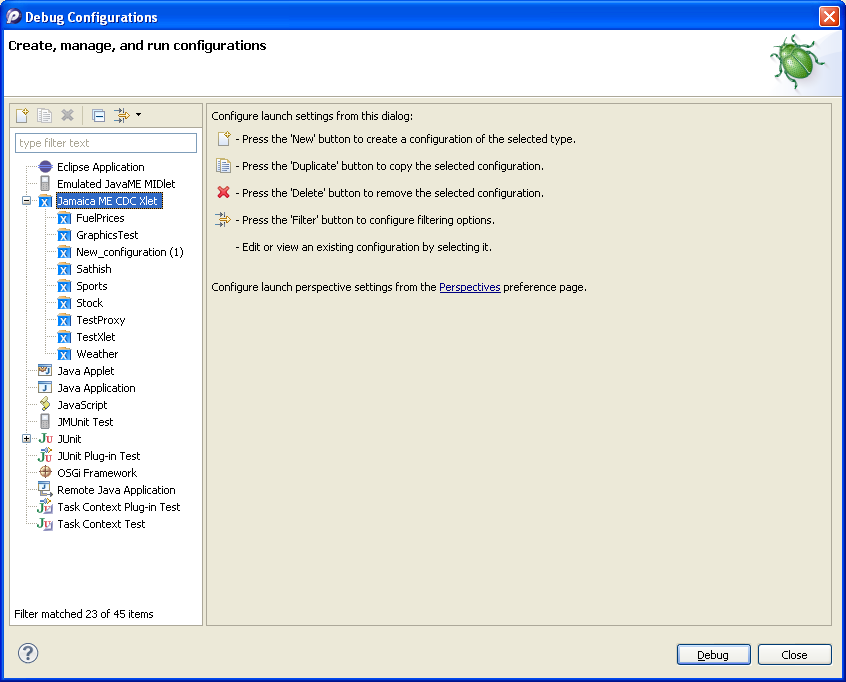
From the menu select‘Run / Debug Configurations…’ and choose ‘Jamaica ME CDCXlet’. Press the new button.
Enter name for the debug configuration and press the Xlet Main Class‘Browse’button.
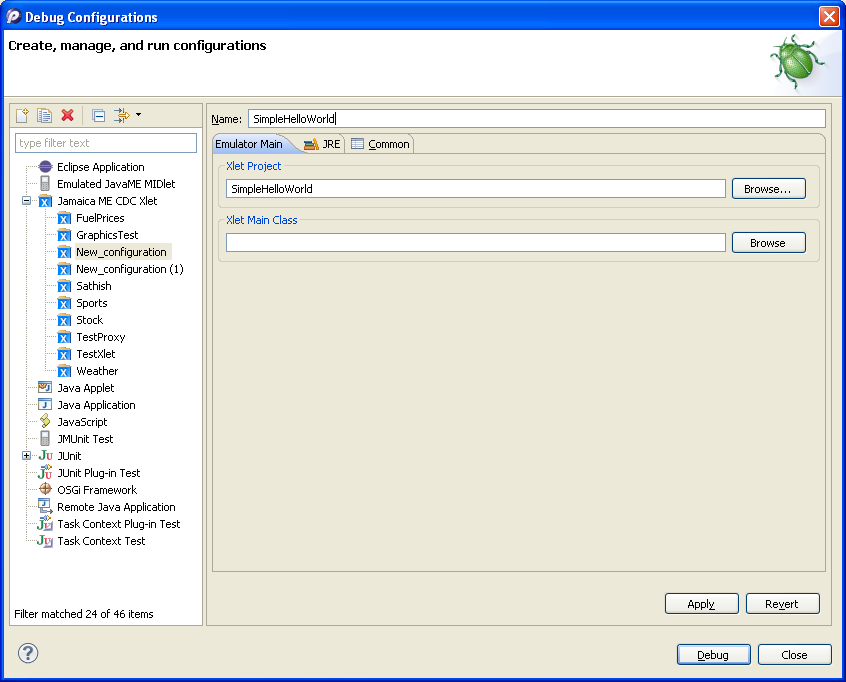
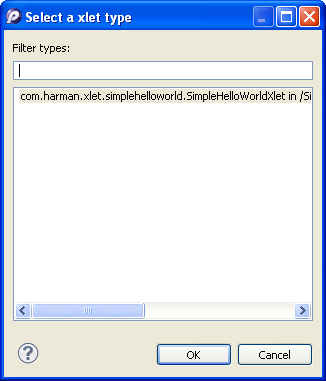
Eclipse will list all the classes in your project which implement the Xlet interface. Most projects will only have one class shown. Select the class and press‘OK’.
Click the‘Debug’ button to run the Xlet. Output from the program will appear on the console window in eclipse. As the Xlet does not exit you need to stop the debugger manually from the debug window.