UI Framework Building Block
The purpose of the UI Framework is to assure a consistent and uniform user experience across all third party applications by establishing a suite of standard UI library components and a shared UI framework.
The UI Framework is intended to be distributed to FCA’s authorized Tier 1 suppliers and third party partners for application development on the Uconnect® Panasonic VP4R head unit (HU). It supports both 8.4” (landscape) and 12” (portrait)
HU screen display variants integrated into a single common package. The UI framework is intended to be used for managing the necessary screen templates, localization files, and resource files. All common UI components shall have a dependency on
preloading the shared UI framework.
The UI Framework is dependent on the Aicas Application Management System (AMS) 2.0 and the Codename One 2.0 frameworks. It complies with FCA Uconnect® HMI design and style guides and supports the Uconnect® Simplified Branding
theme for all components.
About this guide
This guide is intended to provide basic instructions on using the UI Framework. It will take you through getting your PC set-up to use the UI Framework and create a HelloWorld app using Eclipse.
Prerequisites
- The appropriate JamaicaCAR SDK and Eclipse plugin (Linux/x86_64 or Windows/x86) have been downloaded and installed. See Set-Up to Develop Apps for the Panasonic Radio. Additional
emulator installation details can be found in emulator_documentation.pdf under the JamaicaCAR Emulator installation directory.
- Font properties and font files to be used by JamaicaCAR Emulator have been downloaded and installed in proper directory (c:\fs\apps\fonts or /fs/apps/fonts).
The font files can be found in Emulator_Fonts.zip or in Downloads in the Emulator & Simulator section.
- For Linux, JamaicaCAR Emulator executable files (both emulator_bin and emulator_debug_bin under Emulator/target/linux-x86_64/bin/) rights set to 777 ( run “chmod 777 emulator_bin && chmod 777 emulator_debug_bin”).
- The version of the UI Framework shared library that will be running on your target HU has been downloaded. The UI Framework shared library will be installed on all HU firmware after November 2017 as a shared library and will be part of
the production KIM packages.
The current UI Framework shared library version is available here SharedLibrary_UIFrame_1.0.0.jar or is available in Downloads in the Building Blocks section.
Top
New Eclipse project creation
You can start your first app by creating a new Eclipse project.
- Create a new JamaicaCAR Xlet project with [File > New > Other...> JamaicaCAR > JamaicaCAR Xlet Project].
Make sure the JamaicaCAR SDK is chosen as project JRE.
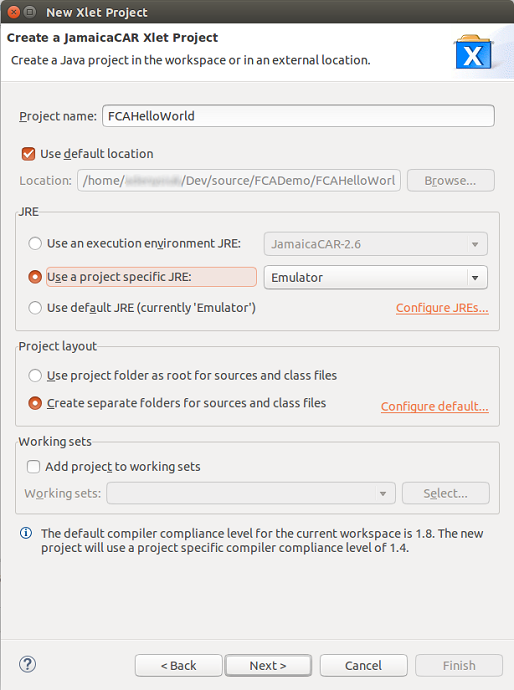
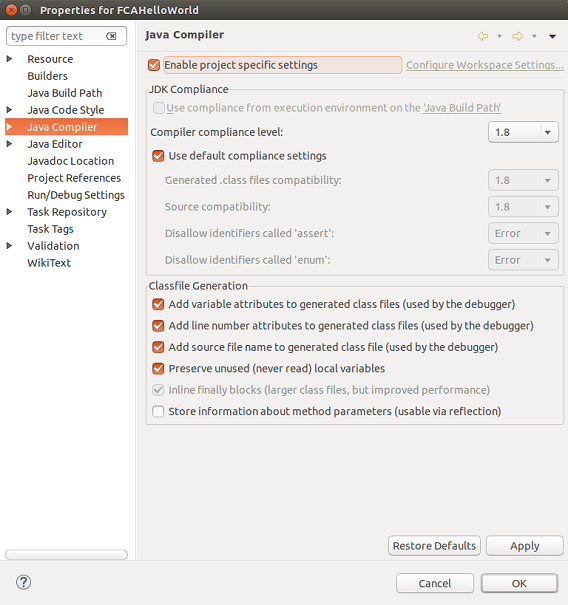
- Make sure new project’s Java compiler compliance level is set to 1.8.
- Create lib folder inside project root and place SharedLibrary_UIFrame_1.0.0.jar there.
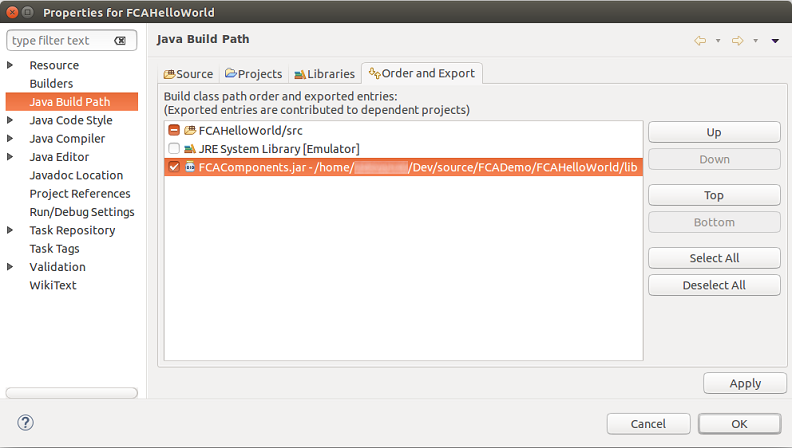
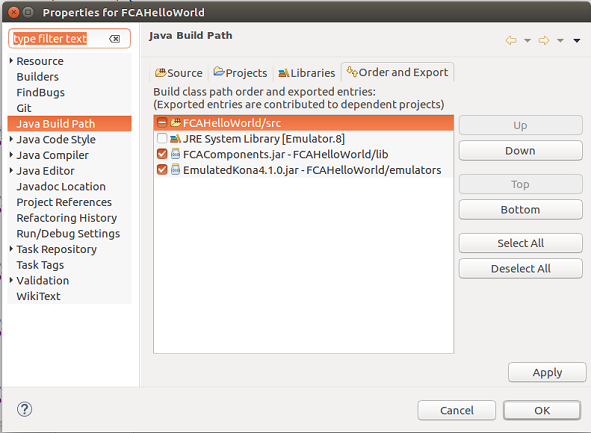
Add this jar to project classpath [Project Properties -> Java Build Path -> Libraries -> Add External JARs].
Make sure the library is exported
[Project Properties -> Java Build Path -> Order and Export].
Note: the image references FCAComponents.jar and should be SharedLibrary_UIFrame_1.0.0.jar.
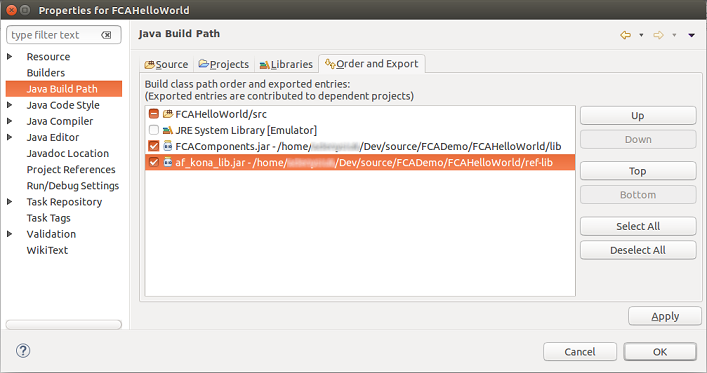
- You will need a Kona implementation.
You can create a ref-lib folder inside project root and place af_kona_lib.jar there.
af_kona_lib.jar can be found in the HU file system. Add this jar to project classpath. Make sure the library
is exported.
- If you want to use an emulated Kona version you can download the current version here EmulatedKona4.1.0.zip
or from Downloads in the Emulator & Simulator section.
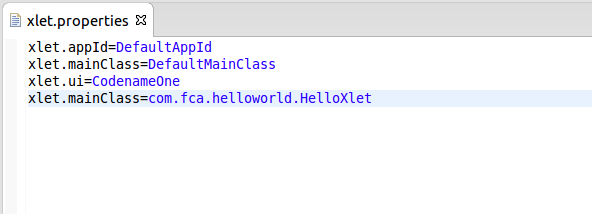
- Create new class (called HelloXlet for example, located at package com.fca.helloworld). Make it extend com.tweddle.fca.FCAXlet.

- Register your HelloXlet class at src/xlet.properties which was generated while project creation - add a line xlet.mainClass=com.fca.helloworld.HelloXlet.
Top
Adding a form
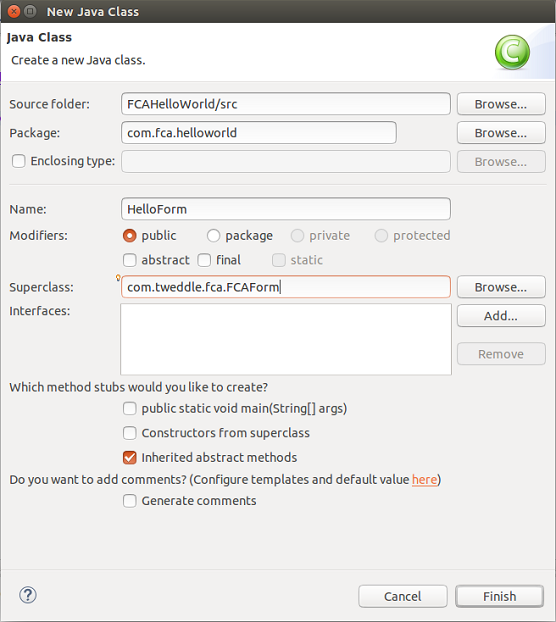
- Create a new class (for example HelloForm). Make it extend com.tweddle.fca.FCAForm.
- At your HelloXlet class override method mainFormClass() - make it return HelloForm.class. It’s a first form to be shown on xlet start:
public class HelloXlet extends FCAXlet {

        @Override
        public Component createSplashScreen() {
         // TODO Auto-generated method stub
            return null;
        }

        @Override
        public String l10n() {
            // TODO Auto-generated method stub
            return null;
        }

        @Override
        public Class< ? extends FCAForm> mainFormClass() {
            return HelloForm.class;
        }

        @Override
        public String resourcesFileName() {
            // TODO Auto-generated method stub
            return null;
        }

        @Override
        public String theme() {
            // TODO Auto-generated method stub
            return null;
        }

    }
- The main entry form’s point is method protected void onCreate(Bundle params). Override it and setup the form (set title, layout, add components etc.).
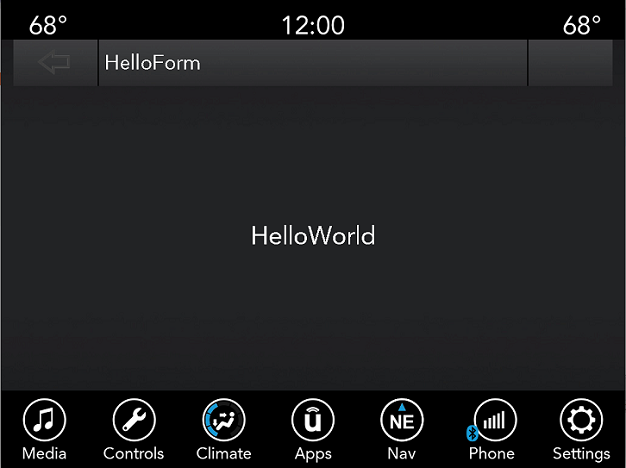
public class HelloForm extends FCAForm {

        @Override
        protected void onCreate(Bundle params) {
            setTitle("HelloForm");

            setLayout(new BorderLayout());

            Label label = new Label("HelloWorld");
            label.getUnselectedStyle().setAlignment(CENTER);
            Font font = ResourceManager.getInstance().getFont(42);
            label.getUnselectedStyle().setFont(font);

            addComponent(BorderLayout.CENTER, label);
        }

    }
NOTE: onCreate() method is called on UI thread. Do not run heavy task there. You may refer to Android framework Activity’s lifecycle as the
FCA UI Components library is built on nearly the same pattern.
Top
Show splash screen during app initialization
Xlet initialization takes some time. You can provide some Component to be shown during this time - override public Component createSplashScreen()
at HelloXlet class and make it return desired Component.
@Override
        public Component createSplashScreen() {
            Label bgImageLabel = null;
            InputStream is = null;
            try {
                // Load a background image from resources
                is = getClass().getResourceAsStream("/res/splash.png");
                Image splashImage = Image.createImage(is);

                // Construct a new label with the background image
                bgImageLabel = new Label(splashImage);

                // Set the label style
                Style style = bgImageLabel.getStyle();
                style.setBgColor(0);
                style.setBgTransparency(0);
                style.setAlignment(Label.CENTER);
                bgImageLabel.setVerticalAlignment(Label.CENTER);
            } catch (IOException e) {
                // ignored
            } finally {
                if (is != null) {
                    try {
                        is.close();
                    } catch (IOException e) {
                        // ignored
                    }
                }
            }

            return bgImageLabel;
        }
    }
TIP: Also you may run some long-lasting task on xlet start - override “public void onLoad()” in “HelloXlet” - it will be executed on BG thread.
Top
Run Your Xlet
- To run the Xlet, go to [Run > Run configurations] and create a new JamaicaCAR Xlet run configuration. Set the Xlet Project.
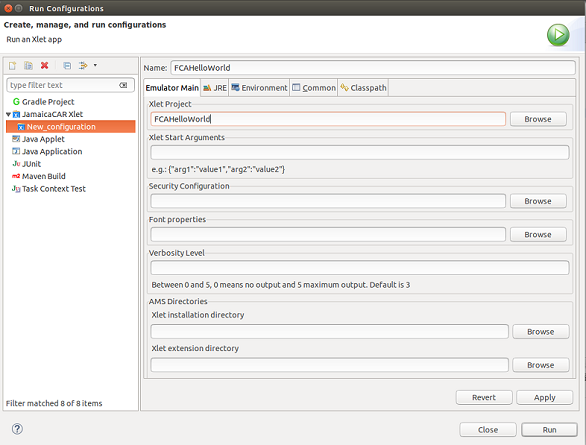
- Put the path to emulator font properties location: /fs/apps/fonts/font.properties
or C:\fs\apps\fonts\font.properties
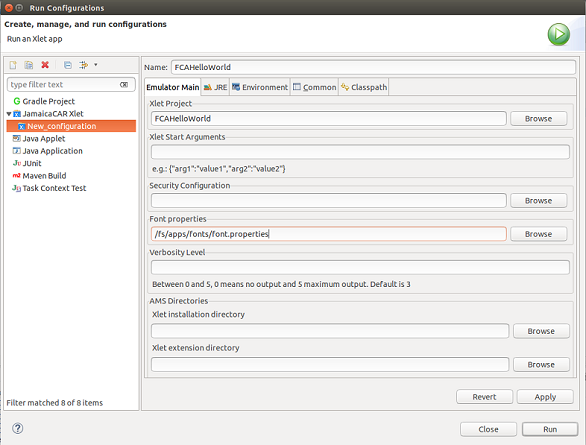
- Set the verbosity level to 5 (TRACE) to see all of your logs.

- Then the run configuration can be started. You should see an emulated image similar to the image below.
Top
Updated: 12/28/2017